Category Archives: Gear

X-C Skiing Shoot With The Fujifilm X100s.

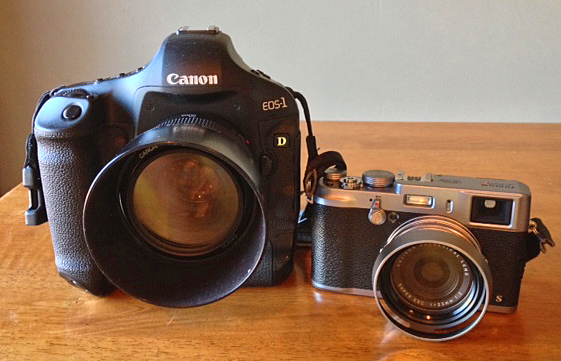
Two of my favorite features of the Fuji X100s have to be the leaf shutter and built in ND filter.  For anyone who works with strobes, these are two unbelievably useful features to have in a camera. If you aren’t familiar, ND filters reduce the amount of light entering the lens/camera.  With out getting too technical, this is useful when you are shooting in bright light for example and you want to use a wider aperture.  Without an ND filter, this is especially difficult to achieve if you are also trying to shoot with strobes in that same environment.  When shooting with strobes, most cameras have a limited maximum shutter speed you can shoot with.  Shooting faster than this shutter speed will result in the physical shutter of the camera showing up in the photo, cutting off some of the light produced by the strobe.  This isn’t an issue with a camera that uses a leaf shutter as opposed to a focal-plane shutter. Leaf shutters allow you to sync a strobe at pretty much any shutter speed.  The only limitation then becomes the speed of what you are using to trigger the strobes with from your camera, as well as the flash duration of your strobes.


This past week I set off to shoot a shot I have had in my head ever since I got the camera.  I wanted to shoot a sunset cross-country skiing action shot lit with strobes.  The X100s was the perfect camera to help me get the shot.  I asked Phil Anschutz, a division 1 college skier, if he would help me out.  He was onboard so we set out to shoot.


X-C_Skiing_2

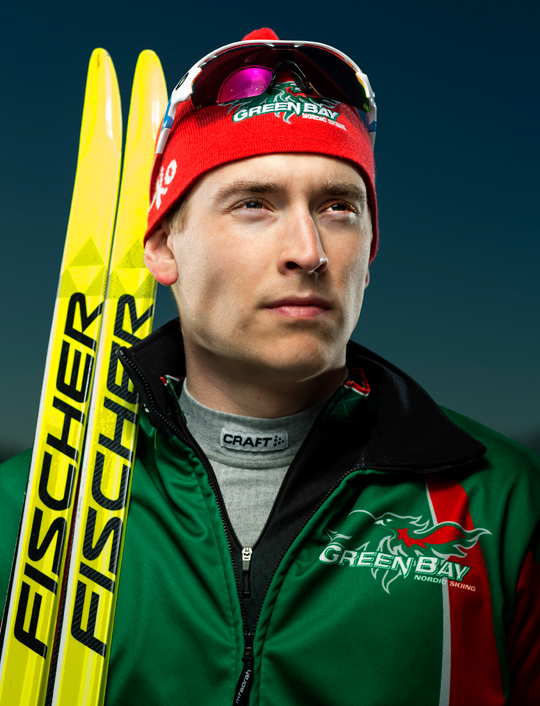
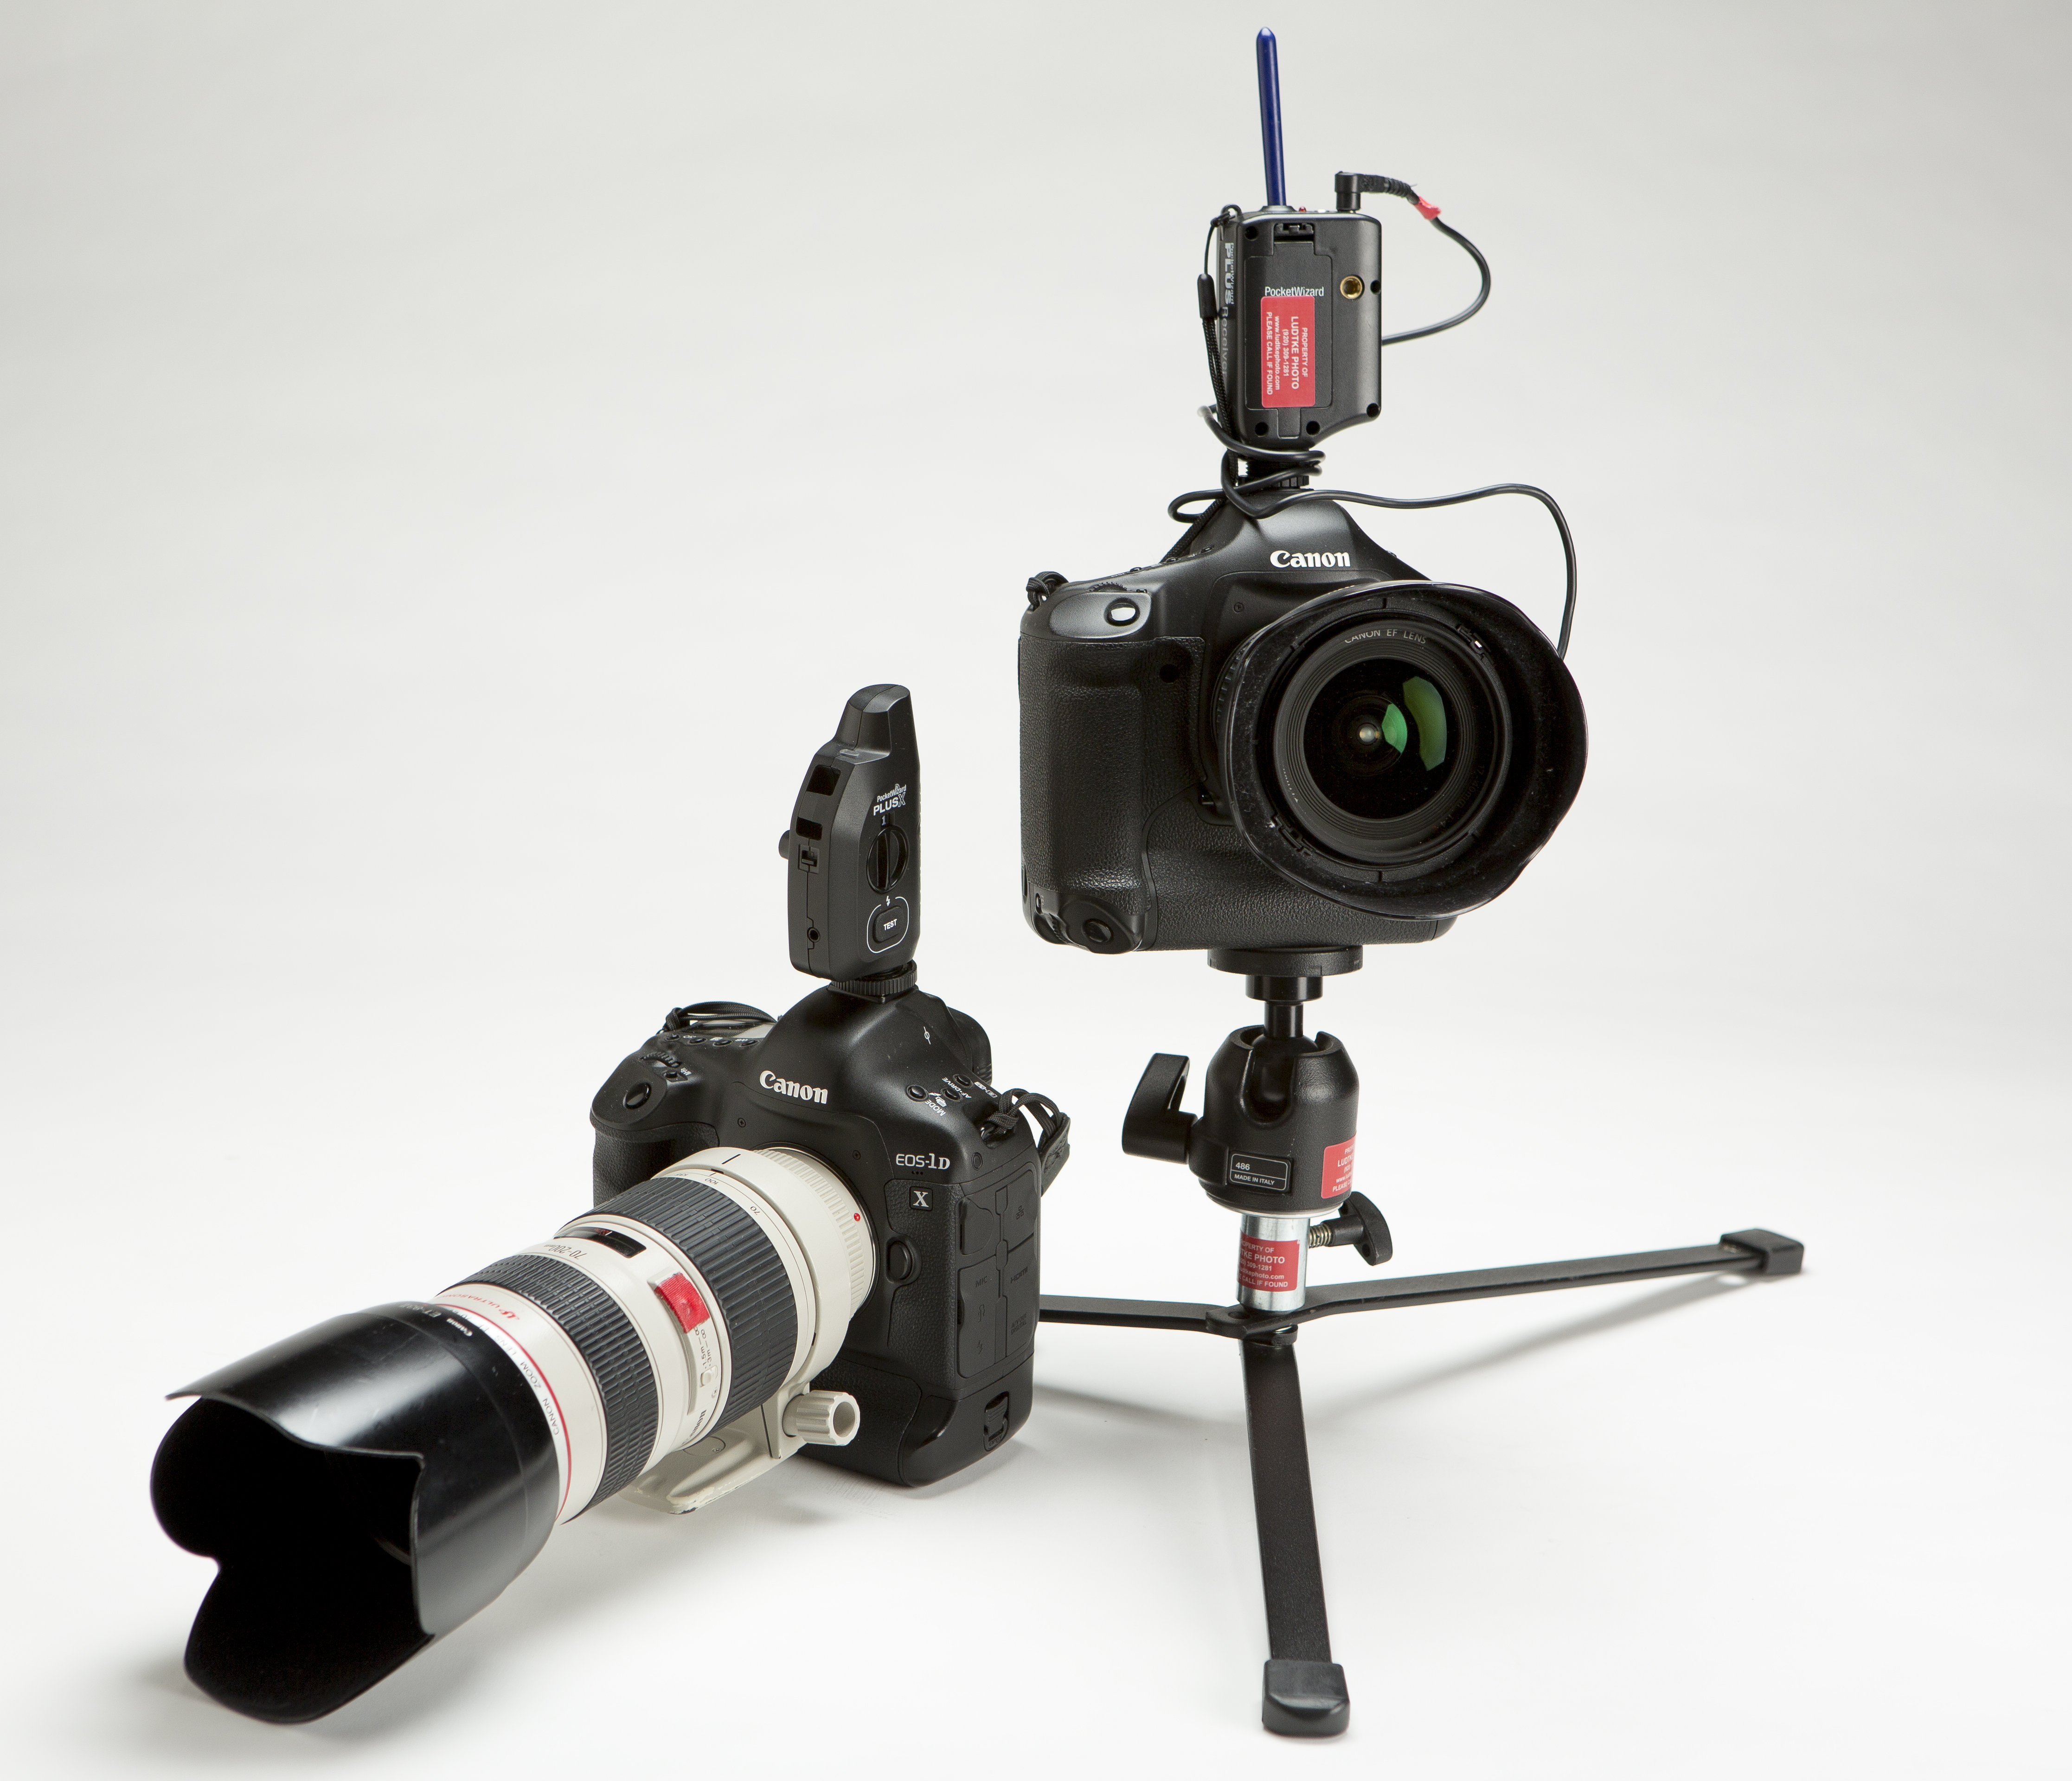
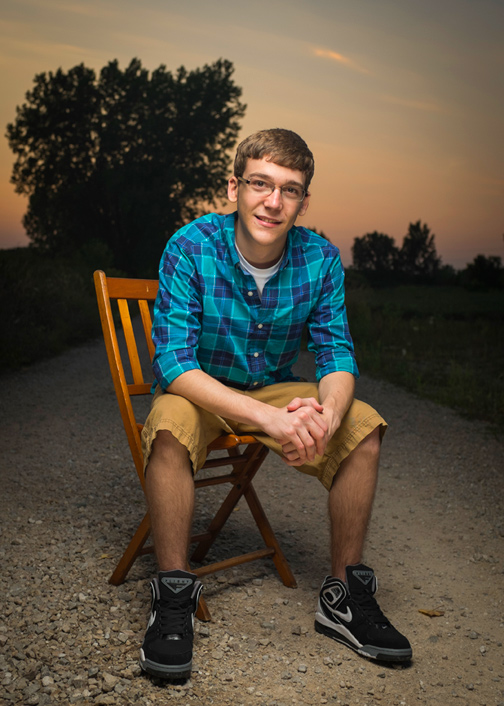
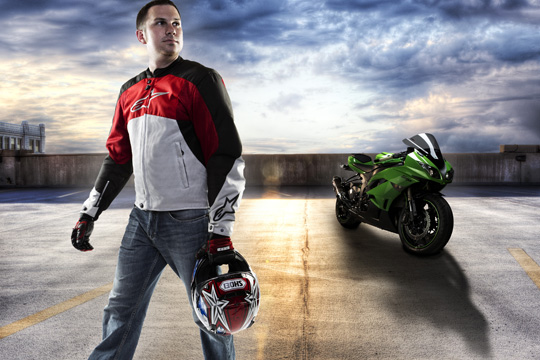
Canon 5d mk III 85mm 1/200 f5.6 iso 50

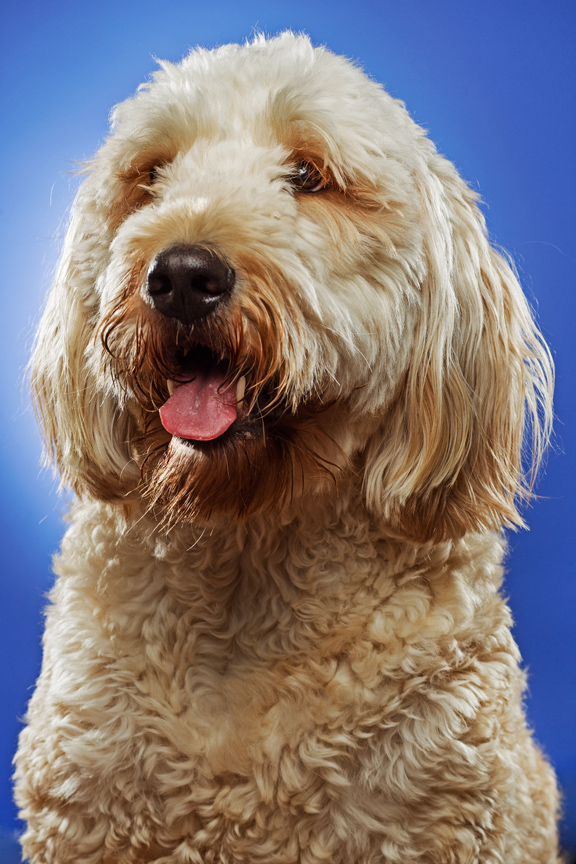
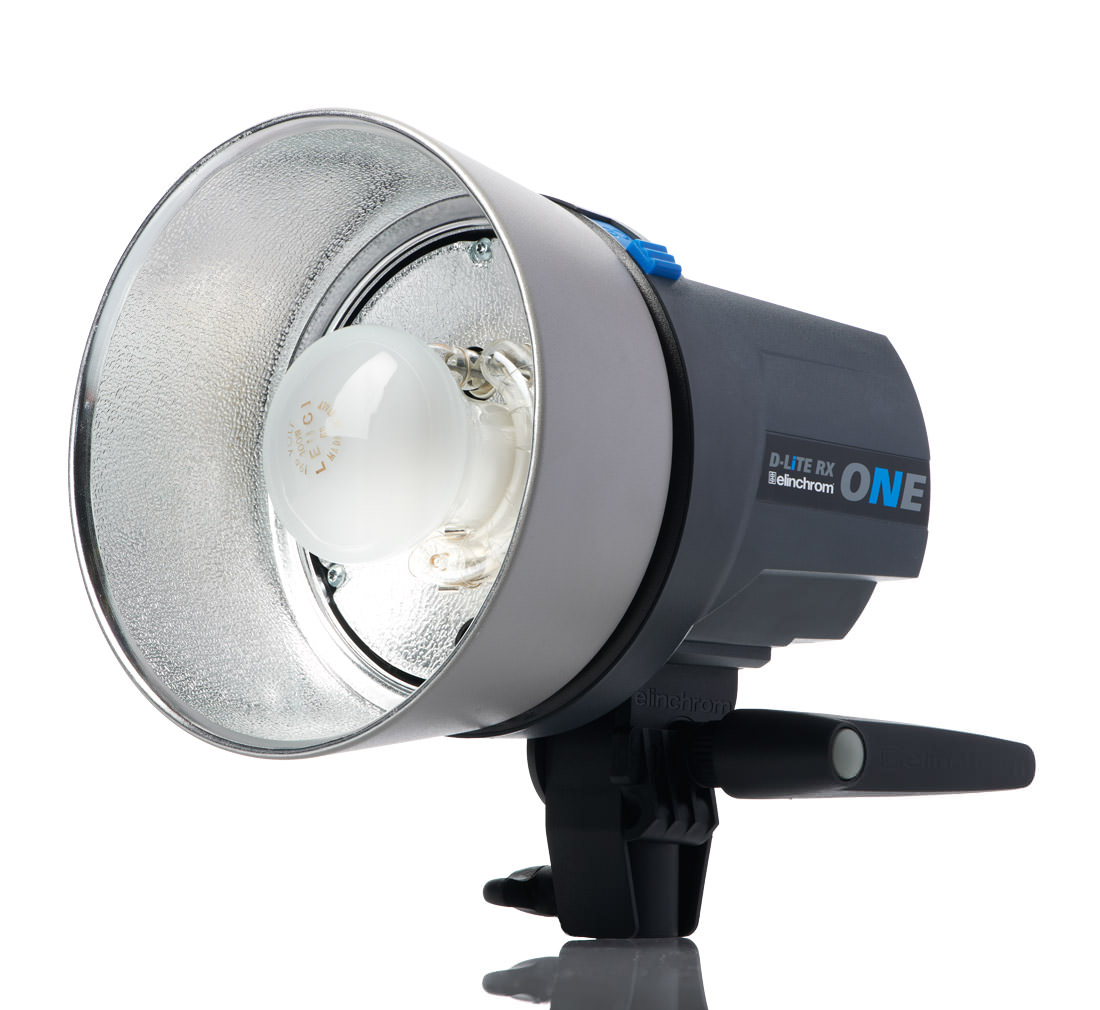
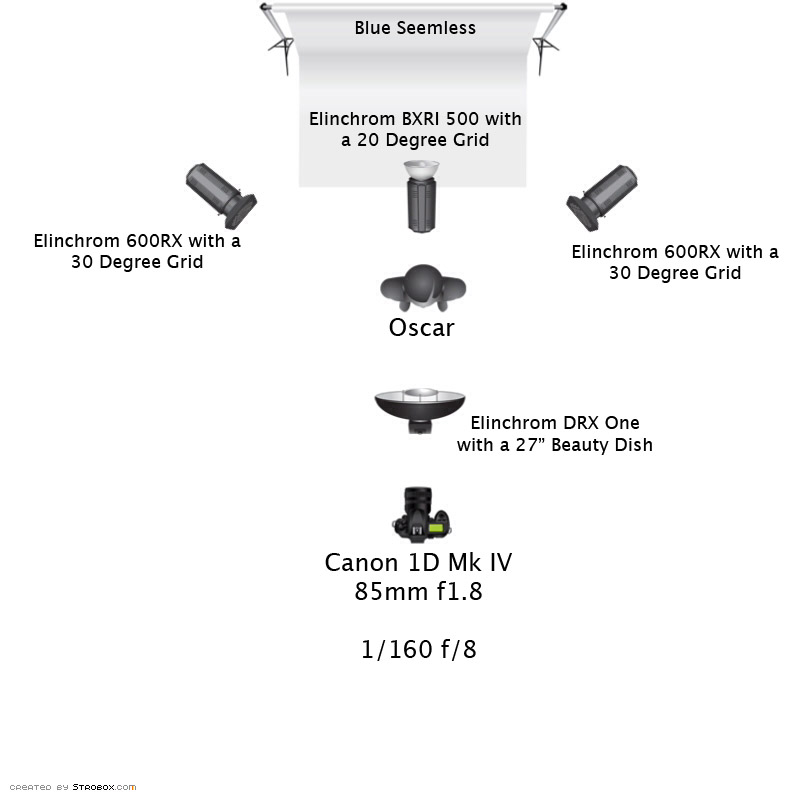
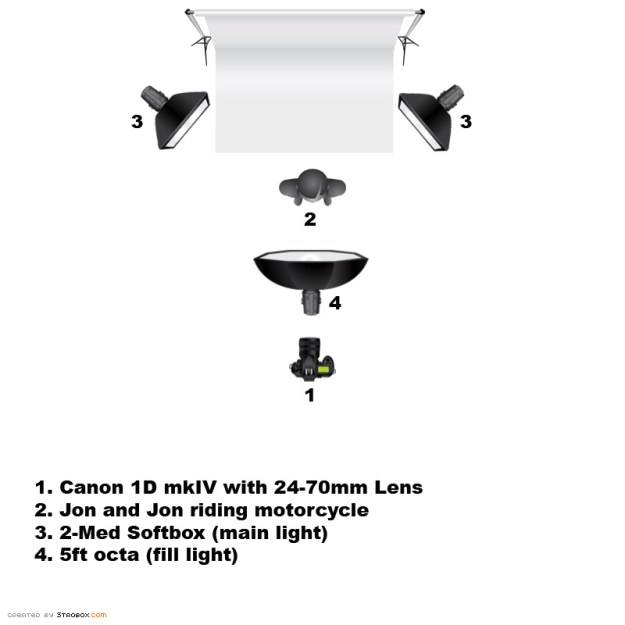
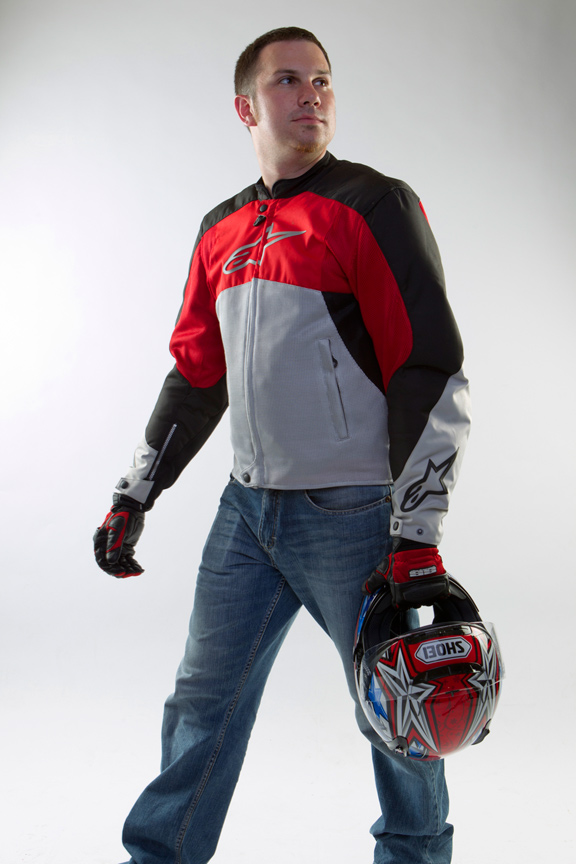
When we got to the location, the sun wasn’t quite as low in the sky as I wanted it, so we started by shooting a lit portrait.  I shot the portrait with my Canon 5d mk III and an 85mm lens.  I had to shoot with a –3 stop ND filter to be able to knock down the ambient light and shoot at a wider aperture.  I lit the shot with Elinchrom strobes.  The main light was a beauty dish set above camera in front of Phil.  I then used two more strobes with high performance reflectors behind Phil on each side, rim lighting him.


X-C_Skiing_1

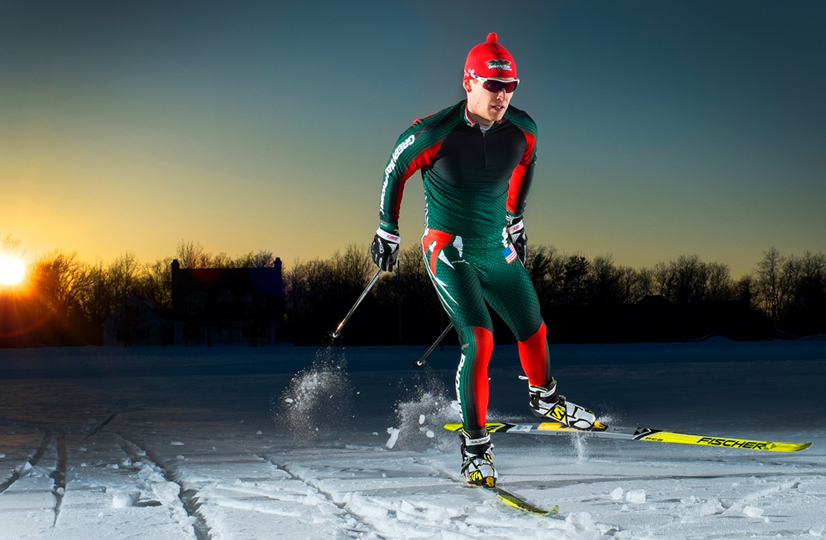
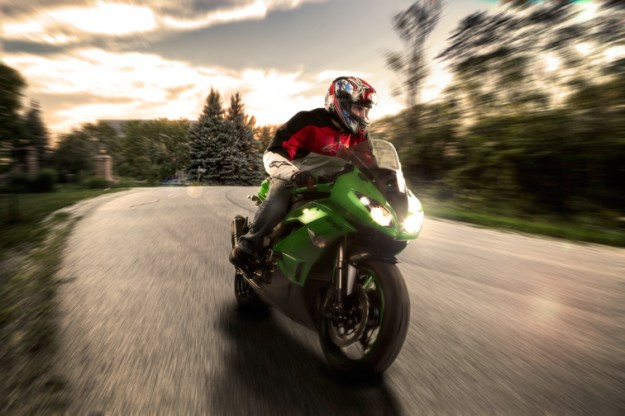
Fuji X100s 23mm 1/500 f11 iso 200

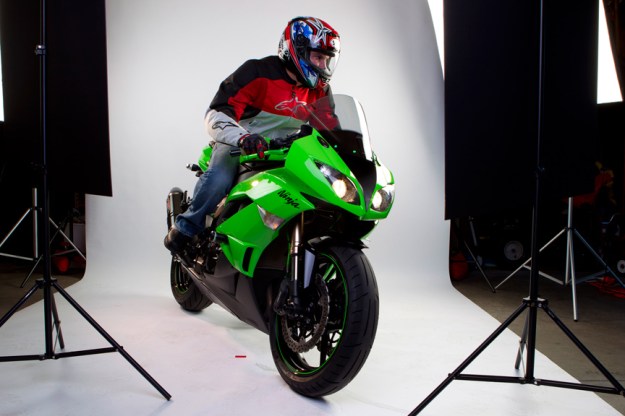
After we had gotten the portrait shot, we moved on to shooting the action shot.  I called upon the abilities of the X100s for this picture. I eyed up my shot and lit it very similar to the portrait.  Beauty dish for a fill just left of camera with two strobes with high performance reflectors rim lighting Phil as he skied.  The tough part was timing not only when Phil was in the light “sweet spot,” but also him making sure he was in a good looking physical position as he skied past the lights. The camera’s leaf shutter allowed me to sync my strobes at 1/500s, helping me to knock down some ambient light but also making sure I didn’t get any ghosting as my strobes froze the action.  The set up worked flawlessly, helping me get the exact shot I was hoping for.

In my opinion these are some pretty powerful features to have in a compact camera that costs only around $1,200.  This is just another reason why my X100s is one of my favorite cameras.

Basketball floor remote camera: A quick and easy way to shoot a different angle.


3

Remote cameras are nothing new to sports photography.  In fact, for major publications and news agencies, remote cameras are a regular part of shooting an event.  A little over a week ago I shot a basketball game between UW-Green Bay and Valparaiso for UWGB.  I had an opportunity to borrow a fellow photographers Canon 1Dx for the game, giving me three bodies at my disposal for the night. (I currently have two Canon bodies that I shoot with that are my own).  I thought, what a good opportunity to set up a third camera as a remote for the game.  I like to take every opportunity possible to give my client a different angle than what they are use to getting from shooting a basketball game.


The only issue I had that day with getting a remote set up for the game was the time crunch I was under.  I started game day by waking up a 4am to go shoot B Camera video on a shoot an hour south of Green Bay.  I knew as soon as the video shoot was over, I would only have a small amount of time to drive back home to shoot the basketball game. Normally one of my favorite remote camera positions is to shoot directly down on the basket from the rafters of the Resch Center in Green Bay. The only problem with this position is it takes about a half hour to get a camera set up, ready to shoot in that position. Instead I decided to take a quicker route and set up a floor remote.

Remote_Setup


The set up I used is fairly simple.  I use a ground level light stand with a ball head attached.  I set up my Canon 1D mkIV with my wide angle zoom lens and set up the camera to fire every time my main camera fires. I used Pocketwizards to trigger the camera remotely. I composed my frame, locked down my focus and was ready to shoot. I like this set up because not only is it quick, but it’s also easy to set up. It also allows the remote camera to sit next to me while I shoot the game. I can keep an eye on it, making sure it is triggering and its not getting messed with by fans.

1

A frame from my main camera, a Canon 1Dx with a 70-200mm lens.

2

The corresponding frame from the remote camera. Canon 1D mkIV shot at 17mm.

The floor set up worked out very well for the game.  This angle allowed me to piece together in Photoshop, a 7 shot sequence of UWGB’s Keifer Sykes on a break away dunk all in one shot (first photo of the post).  It was a picture that my client had never gotten before and they were very excited about it.


Dog Portrait and Lighting Diagram : Elinchrom DRX One

Here is a quick portrait I shot of our dog Oscar last week.  I shot this while testing out one of Elinchrom’s new DRX One strobes.  If you aren’t familiar with this light, it is a new 100ws compact monolight from Elinchrom.  It has about twice the power of say a Canon or Nikon Speedlite.  The great thing about it that it is smaller, lighter, and much more compact that the other Elinchrom monolights I own.  Its easy to travel with without taking up a lot of space in cases.  The 100ws worth of power put out by this light is plenty for an indoor portrait for example.  It also can also be powered down low enough level to let you shoot at much faster apertures with strobe lighting.  So far its been a great addition to my lighting gear.  Oh and the best part is it only costs about $225.00.


OSCAR

Canon 1D mkIV 85mm 1/160 F/8


DRXone

Elinchrom DRX One


Oscar Light Diagram

Lighting Set Up

Fujifilm X100s


I’m usually not one for writing equipment reviews, although I do enjoy reading them, but I did want to share my thoughts about the Fuji X100s.  If you are looking for specs or the down and dirty details about this camera you are going to need to look somewhere else.  There are plenty of other sites out there where you can find that information.  What I’m looking to do is answer the two questions about the camera I have been asked by my peers in the photo biz.  Why did you buy that camera and do you like it?


Let me give you a quick camera gear background of what I’m use to working with.  Since college I’ve been shooting with Canon DSLRs.  I have used everything from a 10D as my first digital camera to the 5D Mk III and 1D Mk IV as my current bodies. Ive pretty much had my hands on every pro level DSLR from Canon. I very much enjoy working with the Canons, rarely have they ever let me down.  They are solid, fast and for the most part can take a licking and keep on ticking.


101 X100s

Fuji X100s compared to a Canon 1D mk IV, little bit of a size difference.


The thing I never had in my arsenal though was an everyday camera.  I consider the Canons work tools.  It always felt like a burden to use them for anything other than work.  A day at the beach, family birthday party, quick weekend trip to Chicago are all examples of times I would have loved to have a camera with me but never did because I didn’t want to lug around a DSLR with a 24-70 on the front all day long.  I’ve looked at many point-and-shoot style cameras over the years as a possibility to fill this void.  Needless to say they all fell short when it came to image quality and control.  I wanted DSLR quality images in a point and shoot sized body.  I also wanted to be able to control shutter speed and aperture with out having to go through a bunch of menus to do it.


Then Fuji announced the X100.  It looked like the answer to my camera conundrum.  The more I read about it the more I found out that the early cameras where plagued with slow and inaccurate auto focus issues.  I battled this in the early months of owning a Canon1D mark III until Canon fixed it.  I didn’t want to throw money at a camera I would hate using because it didn’t live up to my high expectations.  So the search continued.


Then earlier this year Fuji caught my attention again when they introduced the improved version of the X100, the X100s.  The camera got a new sensor and improved auto focus speed and accuracy.  After reading reviews by other pros who had gotten one and felt is was good enough to use on paid gigs, I wanted one.  I called my local camera dealer (Jeff at Badger Graphic Supply in Kaukauna WI) and he was able to get me one surprisingly way before the big stores even had them in stock.  Since I’ve taken it out of the box early this summer, I’ve been hooked.  It is hands down one of the best cameras I’ve owned and possibly the most fun to shoot with.  I’ve pretty much had it with me every day and felt it was reliable enough to take as my only camera on a big two-week family vacation to Florida (if I didn’t have the X100s I probably would have taken my 5D with a couple lenses).


The X100s image quality rivals that of DSLRs with APS-C size sensors and even at times that of the full frame cameras like my 5D Mk III.  It has a sharp 35mm full frame equivalent f/2 lens that is even sharp wide open.  Best of all it is small, light weight and you have real controls on the camera for shutter speed and aperture. Oh and the hybrid viewfinder kicks butt.  The camera is just a joy to work with.  And like many other pros who have one, I’ve recently started to use it on paid gigs.  Here are some of my favorite images I’ve shot with it so far.


102 X100s

103 X100s

The X100s plays very well with strobes.  Both images above were shot using a 1/500 shutter speed to sync with the flash.  Faster than you would find on a DSLR.

104 X100s

105 X100s

106 X100s


107 X100s

Thanks to it’s almost silent operation I was able to get this above shot of the King with out him knowing.

118 X100s


108 X100s

109 X100s

110 X100s

The X100s renders colors beautifully.

111 X100s

112 X100s

113 X100s

114 X100s

The X100s is a great travel camera, nice and small, you don’t feel like some creepy guy taking pictures with a monster camera and lens at the beach.

115 X100s

116 X100s

117 X100s

The X100s is one of the best low light cameras I have ever worked with.

119 X100s

120 X100s

121 X100s

122 X100s

123 X100s

124 X100s

126 X100s

Although it will never be considered a very good camera for sports, I was still able to capture some great action shots with the X100s.


Here is a quick list of my pros and cons with the camera.


Pros:

–        Image quality is outstanding, especially in low light and when it comes to

dynamic range

–       Size, smaller and lighter but doesn’t feel like a toy.

–       Fast, sharp lens

–       Leaf Shutter (sync flash at pretty much any shutter speed!)

–       Exposure controls actually on the camera not hidden in a menu

–       Hybrid Viewfinder (I hate cameras with just electronic viewfinders or even worse no viewfinder at all)

–       Silent (in silent mode this thing makes almost no noise, great if you are a street photographer or wedding shooter)


Cons:

–       Battery life stinks. (have a couple more with you, you can buy extras cheap)

–       Battery meter all of a sudden goes from showing life to dead. (hopefully something a firmware update can fix)

–       Menu system is a little complicated at first


All in all I’m really happy with this camera.  As long as you know what it is and what it is capable of, you can make a judgment as far as if it’s a good camera to add to your arsenal.  I love mine.  I think if you are a pro who is looking for something compact that you can use along side your DSLRs, this is a good option.  If you are starting out in photography and are thinking of buying a DSLR, you may also want to consider buying a X100s. One things for certain, Fuji has caught my attention with their line up of X series cameras.  I think I hear an X-Pro 1 calling my name.

Composite Photography: Jon Davis and his Kawasaki Ninja

Recently I started experimenting with building composite images in Photoshop.  I always have been drawn to the great composite work of photographers like Joel Grimes and Dave Hill just to name a couple. I’ve been intrigued with the thought of being able to come up with a photo in my head and being able to execute it fully without being limited by things like time of day, location, budget, weather along with the many other factors that can complicate the creation of a photo.  Building composites allows you total control over your final image.  Not everyone is a fan of this type of work though and it may not render the right type of photo that a client may be looking for in certain situations.  But I think when a client knows you have the ability to create something different like a composite image in your photography arsenal, you become just a little bit more valuable.

JonMotorcycle


Now by no means do I think the two images I have created are perfect examples of composite images.  Lets just say I jumped in the pool with out really knowing how to swim.  The two images are a couple of shots I had bouncing around in my head for a while.  I wanted to shoot some cool sort of edgy shots of my buddy Jon and his motorcycle for my portfolio.  I wanted something with a little bit different, a little bit more surreal feel to the final image than just your run of the mill environmental portrait.  I got some books, watched some demos on the internet and thought building a composite would be a great way to execute these images.  So I gave my buddy Jon a call and he was all on board to help me out by donating his time and bike in exchange for some nice pics of him and his ride.

JonMotorcycle-2


The images of Jon and his motorcycle were all shot on a white seamless in order to easily extract him and the bike from the image.  Below are a couple of lighting diagrams showing how I lit him and the bike.

Jon-Light


This was the set up to for the shot of Jon holding his helmet as well as him on his motorcycle.

Jon

Shot of Jon straight out of camera unedited.

_M4_0366

Jon on his motorcycle straight out of camera unedited.

Motorcycle-light

This was the set up for the motorcycle by its self.

Ninja

Motorcycle straight out of camera unedited.

The next task at hand was to go shoot some backgrounds.  The background for the portrait shot of Jon walking from the bike was shot on the top level of a parking ramp in downtown Green Bay.  The Background for the shot of Jon riding was actually taken not to far from my house.  Taking a page out of the Joel Grimes book of composite creation (I don’t believe Joel has an actual book on creating composites) I decided to shoot HDRs of my background to help get as much dynamic range as possible since both shots were heavily backlit.  The HDRs were then quickly processed in Photomatix Pro before being taken into Photoshop to put together.

Background

Six exposure HDR combined in Photomatix Pro unedited.

Background-Sky-3

I didn’t think the sky was interesting enough for what I wanted so I went into my library of sky photos and created this HDR to use.

Background2

The background for the riding shot. Six exposure HDR combined in Photomatix Pro unedited.

Then after a great deal of extracting parts, adjusting layers, dodging and burning, creating shadows and a bunch of other Photoshop magic, I finally churned out a couple of images.  Thanks again for looking.

Matt


Tennis Portraits and Lighting Set up.

As I mentioned in my first post, I would occasionally share some of the lighting techniques I use to create certain images.  Last weekend I had the opportunity to shoot a local high school’s top tennis player.  We shot a couple portraits along with some action shots all under the same lighting.

The lighting set up was pretty straightforward.  It consisted of three Elinchrom Style 600RX heads.  The main light had a 27” beauty dish boomed out in front of the subject along with two heads with high performance reflectors on each side, set back a little behind the subject. Everything was powered with a Honda generator.

My assistant Matt Becker helped with the setup, as well as tossed balls to our subject. I shot with a Canon 1D mark IV with 17-40mm f4 L, 50mm f1.4, and 85mm f1.8 lenses. All the photos were processed in Photoshop CS3.  Thanks for looking.

Matt

Tennis Portraits and Lighting Set up.

As I mentioned in my first post, I would occasionally share some of the lighting techniques I use to create certain images. Last weekend I had the opportunity to shoot a local high school’s top tennis player. We shot a couple portraits along with some action shots all under the same lighting.

The lighting set up was pretty straightforward. It consisted of three Elinchrom Style 600RX heads. The main light had a 27” beauty dish boomed out in front of the subject along with two heads with high performance reflectors on each side, set back a little behind the subject. Everything was powered with a Honda generator.

My assistant Matt Becker helped with the setup, as well as tossed balls to our subject. I shot with a Canon 1D mark IV with 17-40mm f4 L, 50mm f1.4, and 85mm f1.8 lenses. All the photos were processed in Photoshop CS3. Thanks for looking.

Matt